Creating and Editing Projects
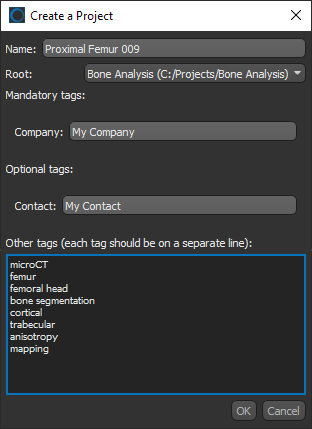
You can create a new project in the Organizer whenever you need to save work on a particular dataset or topic. Click the New Project button on the left sidebar to open the Create a Project dialog, shown below.
Create a Project dialog
You will need to add at least one root folder before you can create a new project (see Adding and Editing Root Folders). You should also select all other required Organizer settings, such as sharing and project tags, before you create your first project (see Organizer Settings).
- Choose File > Open the Organizer on the menu bar.
The Organizer dialog appears.
- If required, you can add a new root folder before you create a new project (see Adding and Editing Root Folders).
- Click the New Project button on the left sidebar.
The Create a Project dialog appears.
- Do the following in the Create a Project dialog:
- Enter a name for your new project.
- Select a root folder in the Root drop-down menu.
- Enter any mandatory tags that are required, as well as any optional tags (see Setting Up Project Tags for information about adding mandatory and optional project tags).
- Add other tags to help searching for the project, optional.
- Click OK to create the project.
The project appears in the Project list (see Adding Data to Projects for information about adding data to your new project).
If required, you can rename projects.
- Search for the project that you want to rename, if required (see Searching for Projects).
- Select the project that you want to rename in the Project list.
- Click the … button and then choose Rename Project in the drop-down menu, as shown below.

- Enter a new name in the Rename Project dialog.
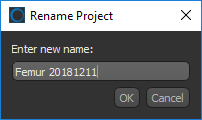
- Click OK to rename the current project.
If required, you can delete projects. In this case, all files within the project will also be deleted.
- Select the project that you want in the Project list.
- Click the Delete Project button.

- Click Yes if you want to delete the project and all related files.


